Home → Cataloging Bibliographic Records → Merging Bib Records → How to Merge Records
10.2. How to Merge Records
Last Updated 02/18/2026
Merging Records in a Bucket
On This Page
Duplicate records should be merged. Merging can be completed in a record bucket following the instructions on this page.
When merging duplicate records, first check to ensure both records represent the same content, and there are no format discrepencies.
Formats That May Be Merged
- Paperback and Hardback
Formats That May NOT Be Merged
- DVD, Blu-Ray, Ultra 4k Blu-Ray (and other video formats)
- Playaways, MP3, and CD Audiobooks
- Large Printand Regular Print
- Board Book and Picture Book
How to Merge from a Bucket
Note: When Item Catalogers or Circulators come across potential duplicate records, they should add them to a designated bucket that Bibliographic Catalogers can regularly check and merge as needed.
-
Navigate to Cataloging>Record Buckets.
-
Create and/or select a record bucket.
-
Select the records that you want to merge, and click Actions → Merge Selected Records.
-
This will open a new tab showing the Merge Records modal.
-
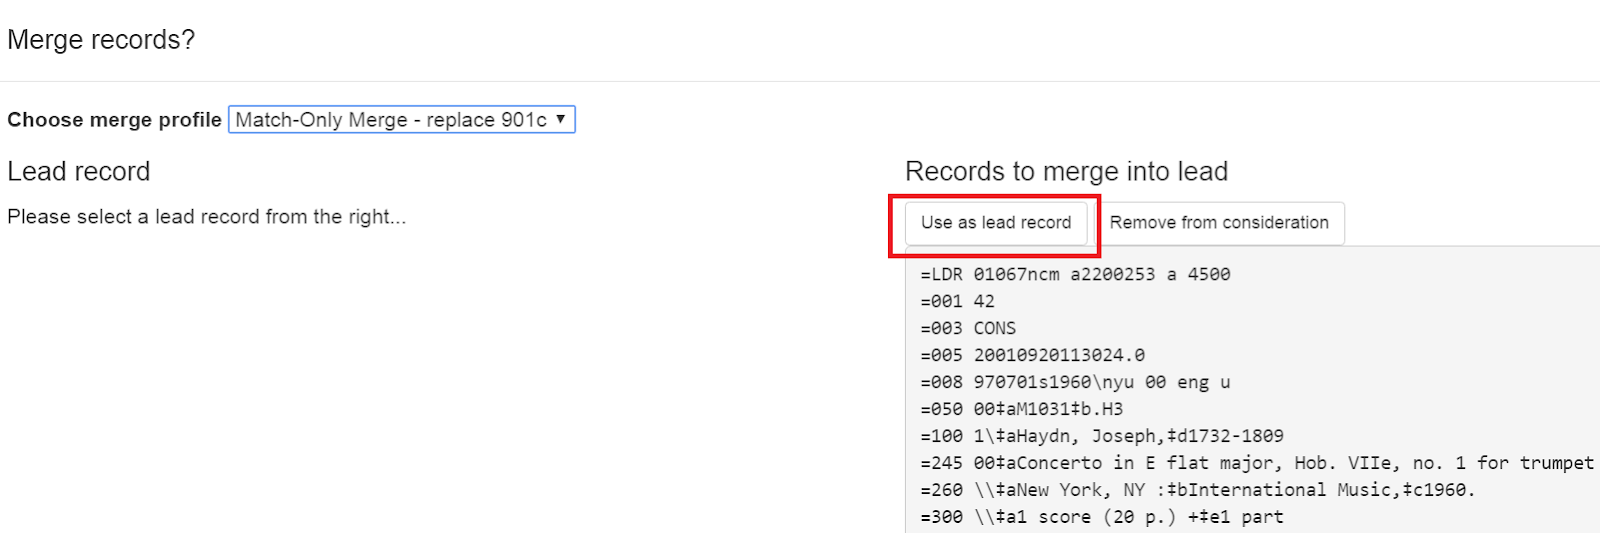
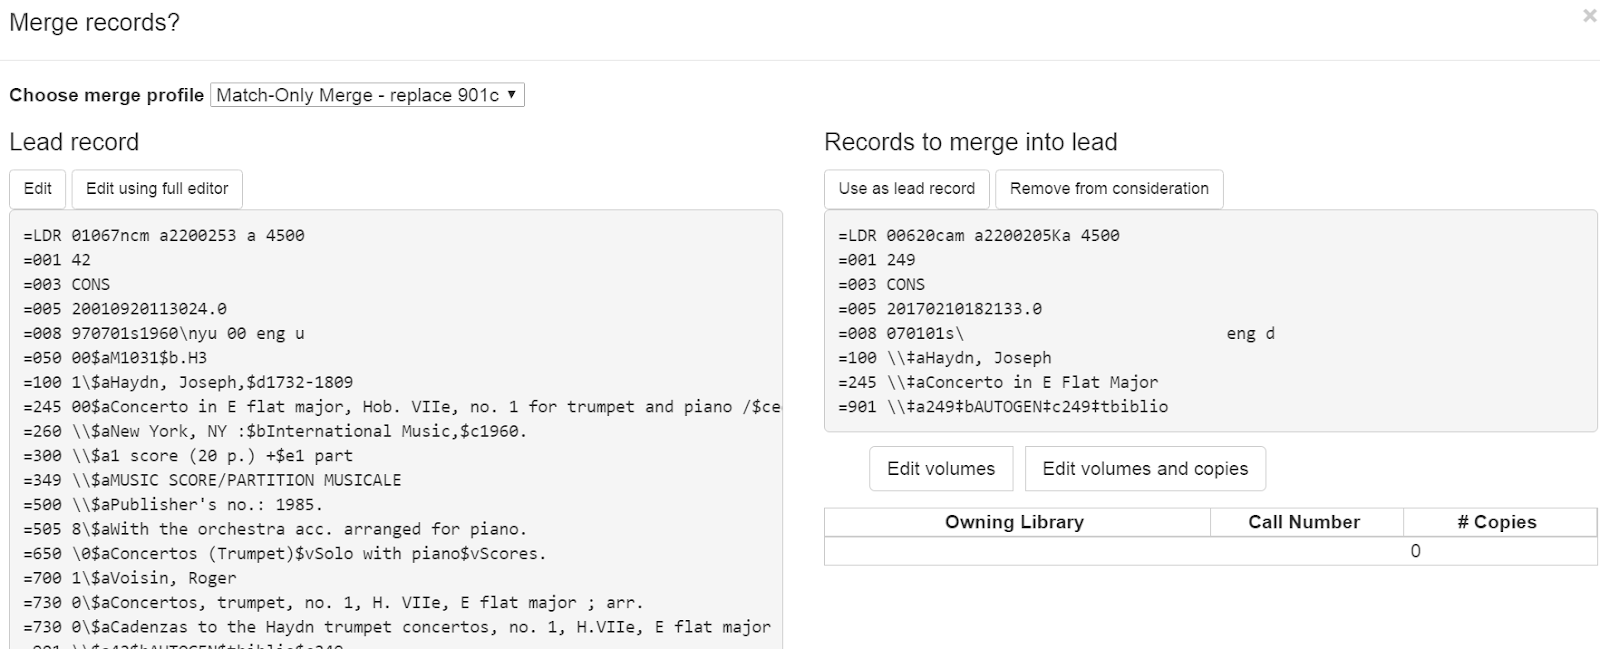
The records to be merged appear on the right side of the screen. Select Use as Lead Record to select a lead record from those that need to be merged.
-
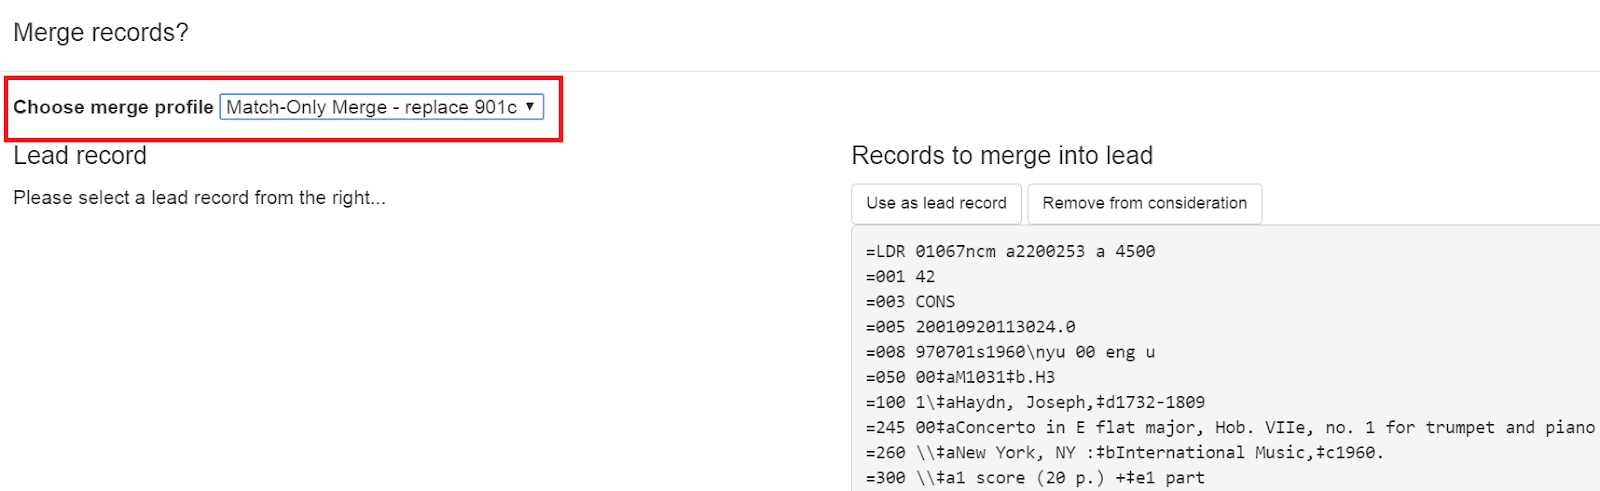
Select a merge profile from the drop down box.
-
After you select the profile, you can preview the changes that will be made to the record.
-
You can change the merge profile at any time; after doing so, the result of the merge will be recalculated. The merge result will also be recalculated after editing the lead record, changing which record is to be used as lead, or removing a record from consideration.
-
When you are satisfied that you have selected the correct merge profile, select the Merge button in the bottom right corner.
-
Note that merge profiles that contain a preserve field specification are not available to be chosen in this interface, as they would have the effect of reversing which bibliographic record is considered the target of the merge.
After the merge is complete, you will be returned to your record bucket. You will see that the record(s) participating in the merge have an updated Merge Date value. All non-lead records will be marked as deleted = yes, active = no, and will have the lead record’s ID in the Merged To field.
Track Record Merges
When two or more bibliographic records are merged in a record bucket, all records involved are stamped with a new merge_date value. For any bibliographic record, this field indicates the last time it was involved in a merge. At the same time, all subordinate records (i.e. those deleted as a product of the merge) are stamped with a merged_to value indicating which bibliographic record was the lead record in the merge.
In the staff catalog bibliographic record display, a warning alert now appears along the top of the page below the Deleted alert indicating when a record was used in a merge, when it was merged, and which record it was merged with, rendered as a link to the lead record.
Administrative Settings for Record Merging
-
Navigate to Administration → Local Administration → Library Settings Editor → Default Merge Profile (Z39.50 and Record Buckets).
-
Select a context organizational unit and a default merge profile, and select Update Setting. The merge profiles that appear in this drop down box are those that are created in MARC Batch Import/Export. Note that catalogers will only see merge profiles that are allowed by their organizational unit and permission
This page was: Helpful |
Not Helpful