Home → Cataloging Bibliographic Records → Bibliographic Record Buckets → Creating Record Buckets
12.2. Creating Record Buckets
Last Updated 02/18/2026
Creating and Populating Record Buckets
On This Page
Bibliographic records may be added to containers called buckets, fromwhich they may be editedor merged. When creating a new bucket, catalogers have multiple options for adding records, including one at a time in the record interface, through an upload or TCNs, directly from a report containing a Record ID display field, and from a catalog search.
Create a a New Bucket
-
Navigate to Cataloging → Record Buckets.
-
Next to the Bibliographic Record Buckets heading, select New Bucket.
-
Give the bucket a name and (optionally) a description.
-
Select Create New Bucket to close the modal and create your bucket.
Adding Records to a Bucket
Bibliographic records can be added to a new or existing bucket via several means, including:
-
Directly in the record bucket interface
-
From the staff catalog search results page
-
From a staff catalog basket
-
From the Item Status interface
-
From within the bibliographic record details interface
-
Directly via one-time or recurring reports output(s).
Upload Records
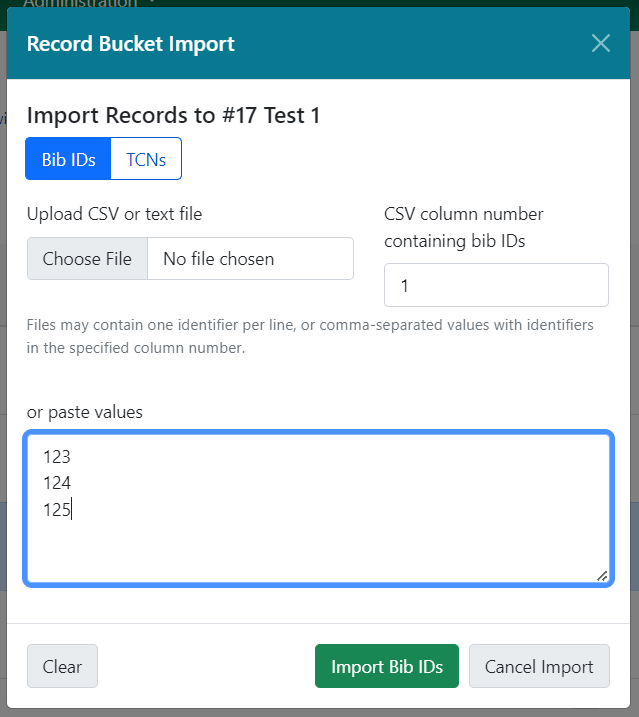
The Upload Records action is available in the Actions menu. Choose a bucket by selecting its checkbox, and then navigate to the actions menu and select Upload Records. When selected, this will open a modal:
From here, you can select whether you want to upload Bib IDs or TCNs. You can select a file from your computer using the Choose file button. You can also, as shown in the screenshot above, paste values into the text box in this modal. You should have 1 value per line.
When ready, select Import Bib IDs (or Import TCNs) to complete the upload.
Note: Precat (Bib ID = -1) or invalid values will be rejected, and the error message will note which values were not imported. Blank lines either in the paste or in the text file will be ignored.
From Reports Output
Buckets can also be populated directly from reports output.
Note: The report template will need to have a column containing numeric Bib ID data in order to populate a bucket.
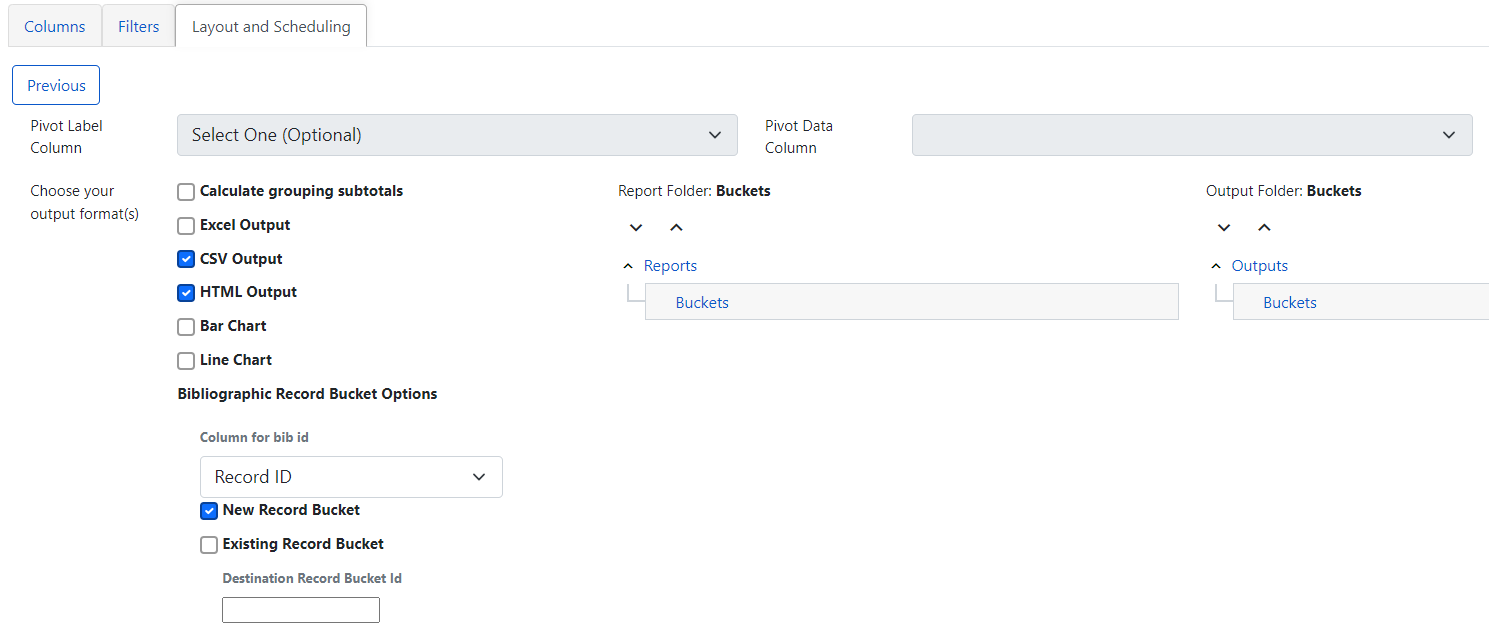
When creating a report, there are two new options on the output tab under the label Bibliographic Record Bucket Options. You are also directed to select the column containing the Bib ID data in your report.
-
New Record Bucket - select this checkbox if you wish to create a new record bucket with your report output. The new bucket will be given the same name as your report title, and its description will read "Generated by report #<report ID>." You can change either of these after the bucket is created using the Edit Bucket action.
-
Existing Record Bucket - select this checkbox if you wish to add your report output to an existing record bucket. Enter the bucket’s ID in the Destination Record Bucket ID field. You will need to have edit permissions for the selected bucket.
Note: If you are running a recurring report and wish to have a single bucket that collects the report’s output each time the recurring report is run, you will need to have an existing bucket to point the output to. Each run of the report will append new output to the bucket.
From Catalog Search
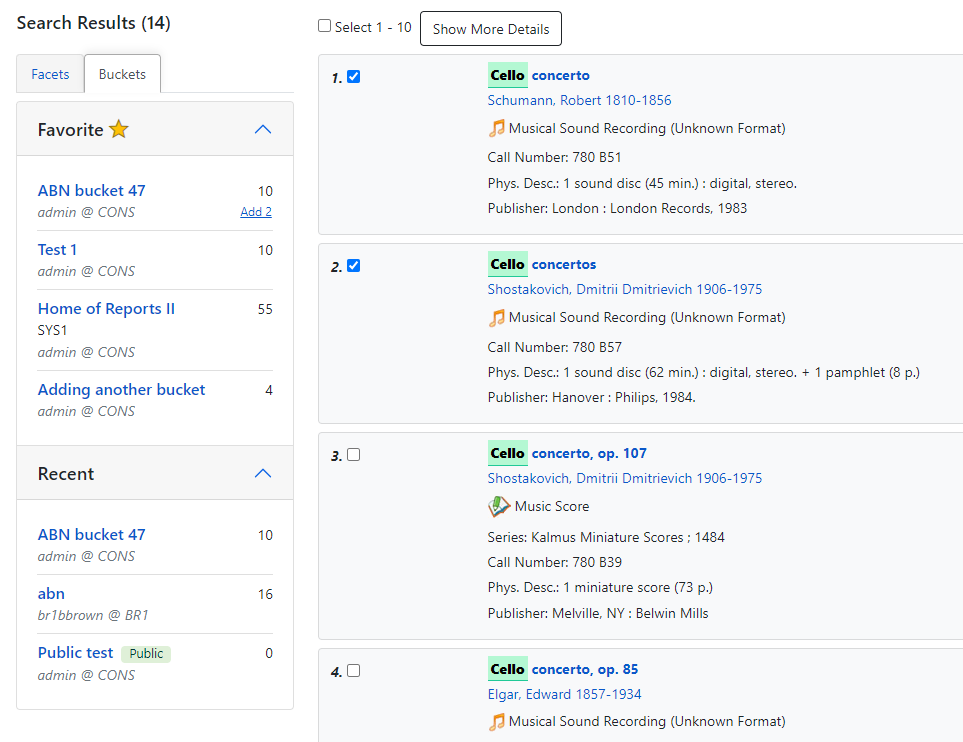
You can add records to buckets directly from the staff catalog search results, or from a basket. In either case, you perform a catalog search and then select one or several records from the results list using the checkbox on each result.
There is a buckets subtab to the left of the catalog search results, which will show your favorites as well as your recently-viewed buckets in two collapsable accordions. Each set displays the bucket name, any organizational unit sharing in place, the bucket owner and organizational unit, and the count of records in the bucket. If you hover over the record count, and have selected records in the results list, you will see an option to add those records to a bucket.
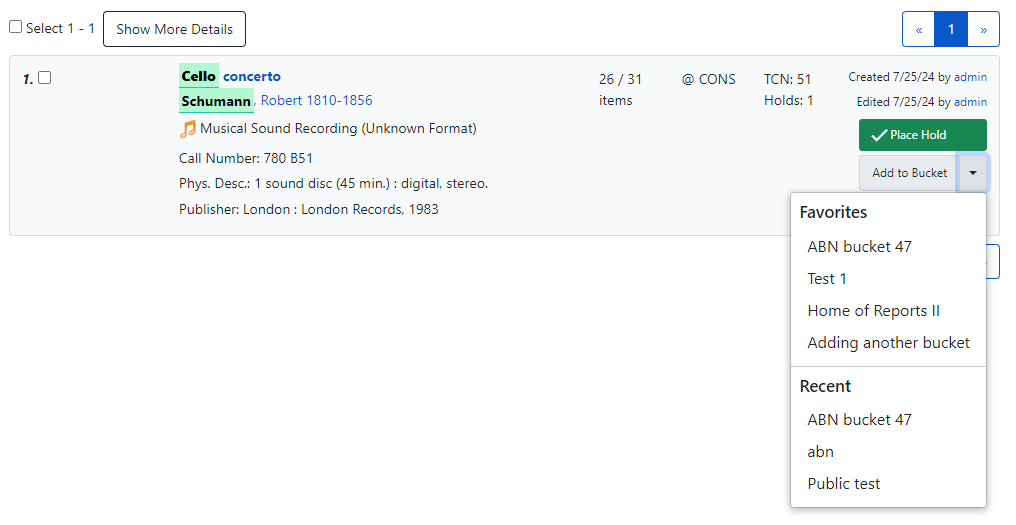
Additionally, you can add a record directly to a bucket from its place in the search results lists. There is a button on the lower right of each result that says Add to Bucket. Select this button to see a list of your favorite buckets and recently viewed buckets. Select a bucket from this list to add a record to your bucket.
This page was: Helpful |
Not Helpful